
Merry Christmas, Happy Hanukkah, Joyous Kwanzaa, or whatever you celebrate. I'm away for the holidays, but have big plans to get the Miata fully debugged and on the road when I return.
All the best to all of you!
Wednesday, December 24, 2008
Saturday, December 20, 2008
New YouTube video - Count Down to Blast-Off!
I asked my brother to put together a YouTube using some of my test drive footage. The idea was to have a cheesy sci-fi theme. I love the Thunderbirds opening and the Space Speed Indicator with everyone's faces distorted by the high speed. We decided not to use song so that you could hear the car's whine.
Hope you like it.
http://www.youtube.com/watch?v=H_tEWdpKm98
Hope you like it.
http://www.youtube.com/watch?v=H_tEWdpKm98
Sunday, December 14, 2008
A few odds and ends
It's a rainy Sunday and while the batteries are being fed, I'm doing a little "debugging."
I noticed that the most negative cable coming from the trunk rack is rubbing just a little on the steering column. So I disconnected and re-routed it.
 I spent some time on my experimental passive cooling system for the Zilla. The idea is to reuse the heater core since it is right by the Zilla. First step is to use it as a reservoir and see if that is enough to keep the Zilla happy. Second step, if this fails, is to add a pump to create a little circulation. Either way, I'm going to need the temp gauge to work...
I did some extensive testing on my temperature gauge. It comes out it was the 12v lead going to the gauge that wasn't right - it showed 12v, but only until the key was on... I also found out you can't test the sending unit by heating it up with a soldering gun while it's against a heat sink. The heat sink soaks up all the heat - like I didn't know that... I ended up connecting a 12v jumper to the Iota and removing the sending unit and heating it with a solder gun and got the gauge to work. Instead of fishing for another 12v source on the instrument panel, I think I'll run a new wire, that way I'll know it works.
I also have to hook up the relay for the Iota with a new 12v lead off the key. That will make 4 devices off the key switch - the hairball, the vacuum pump, the temp gauge and the Iota relay. I think it's safe to say I need a fuse box. Found one on eBay that handled 4 fuses, looked good and was under $10!
Probably won't get a chance to install it until after new years...
Saturday, December 13, 2008
New 12v charger and DC/DC Relay

 Over the week since my drive to the SFEVA meeting, I've been charging the batteries one at a time with my manual charger.
On Friday I decided to invest in a new 12v battery charger. Some of the new ones have AGM settings on them that tailor the charging pattern to the AGM's needs. It sure would beat having my charger on a timer.
Saturday I went down to Sears to pick one up. It being the holidays, this was not easy. None were in the store and, of course, the sales people were less than helpful. I did finally find them in the auto services building out in the parking lot. It took me a little experimenting, but I found that if i used the 2 amp setting it would bring the voltage up to 14.6 before going into a 13.5 volt maintenance mode. This matched what Optima recommends on their web site, and seemed to work pretty well. Not having to check the charger every hour was a big relief too.
 While charging the batteries I installed the relay I got to control the DC/DC converter. You don't want it running all the time as it will drain your battery pack. I thought I could hook it up to the switched side of the contactor (the side that is only hot when the car is running) but the Zilla didn't like that. I got a relay that has a 12v coil ans can switch up to 250v for less than $20 and a single gang plastic junction box to put it in. One side of the coil is ground the other side will come off the key switch.
 Looks pretty good, no?
Thursday, December 11, 2008
Bad Boy
 I've been suspecting that my #5 battery was bad for a while. This was the replacement battery for the one that was damaged in "the meltdown". I was suspicious because it charges up really fast and discharges just as fast. And when using the Zivan, it would pull down more voltage than the others, even though its indicated State of Charge was the same. On the way back from the SFEVA meeting it was hot and had dropped to 10.96v - way below what it should have been. It had also blown the fuse on the BEQ1.
I messaged Ken at Hot Juice Electric (the maker of the BEQ1 equalizers I'm using) to confirm my suspicion of the defective battery. He agreed is was bad and I called the battery dealer. I got someone on the phone who quickly told me to bring it in. After describing the symptoms he agreed that they would do a swap. The details will have to wait for after I return from Xmas holiday, but I have high hopes that replacing this bad boy will fix my charging problems...
Sunday, December 7, 2008
Follow up KFOG interview

I got a call from my friend, Peter Finch, who does the Fog Files on a local radio station, KFOG. He wanted to do a follow up interview now that the car was running (and watch the '9er game). We set a time for Sunday just before game time for a chat and a quick drive. After yesterday at the SFEVA meeting, I wasn't planning on driving it very far...
He showed up and pulled out a huge microphone and even huger digital recorder and, after I backed it out of the garage, got in. He asked a few questions as I pulled out, then I asked him if he had his seat belt on and punched it. To be honest, we were going downhill, but I think it made an impression on him. We then drove maybe a 10 block loop while a few people stared at the car making the funny noise driving around with a microphone in the drivers face.
We got back to the house and plugged the car in so he could record the charger doing it's thing (those radio people like stuff like that). I gave him a run down of the components and he mentioned that it all looks too simple which led him to ask why I thought Detroit couldn't build them...
Anyway, I don't think I said anything stupid this time, so it ought to be a pretty good segment.
Not sure when it's going to air, but I'll post a link when it does.
Saturday, December 6, 2008
EV Miata at the SFEVA meeting

Today is the day.
I have had a string of target dates for getting the car done, but today is the day I promised to take it down to the SF Electric Vehicle Association meeting. The batteries aren't terribly balanced, but good enough for, say 98% state of charge (SOC). I made some progress on the gauges, but still no ammeter, tach or temperature gauge. I was going to hook up the Zilla's cooling system too, but that was not to be.
So, mostly charged and with just a speedo and SOC gauge, I was off.
As this was the first drive farther than around the block, I took my time and stuck to the streets. It wasn't too far, less than 5 miles I figured, so it should make it there and back easy - and it mostly did.
The SOC gauge drooped precariously each time I stepped on the juice (AKA the accelerator). Without the ammeter it was hard to drive it carefully, but I gave it my best. At about 4 blocks away the "Check Engine" light came on. The Zilla uses this to tell you that something is wrong, but I couldn't tell if the controller was overheating, the battery voltage was too low or something else was happening. I pulled over and checked the temperature of the controller using a manual temperature sensor - I stuck my hand on it - and it was just warm. The SOC gauge was showing 50% -which, because it only show the "usable" 50% of the pack, indicated the pack was at 75% SOC - not bad. The wiring under the hood looked fine and nothing smelled hot, so off I went. I found Luscious Garage (great place), where the meeting is held each week and pulled in to the drive. Dale, the president, and a few of the club members were out front around a RAV4 EV. After chatting a bit I broke out my palm to read the Zilla error code - d'oh, the SLI battery was low again! This is the same error that caused the car to limp up the street in the "It's Alive" video... Maybe I need to replace that battery...
Anyway, I got to talk a little about the project in the meeting and got to show my handy work off to some people who "got it" - very nice.
One of the long time members let me know that it takes about 3 cycles to get your pack "broken in." Good info.
After the meeting was over, I borrowed a Luscious charger to juice up my SLI battery. In hooking it up I found the negative clamp had worked it's way loose. So maybe the battery was still good? Maybe. At any rate, the Zilla error was soon cleared.
The SOC gauge was now showing 30% (65%) and I was off.
The SOC gauge which had earlier been bouncing about was now spending most of it's time staying around zero. Not good. The car ran well, though, no rattles or other strange noises, just the whine of the motor. Why do people want to play amplified gas car nosies in an EV?
I drove by a motorcycle club with a guy hanging our front. I think he was drinking out of a paper bag, but I could be wrong. Anyway, I pulled up the red light and stopped. Absolute silence.
He shouted "Why is your car making that whine?"
Me: "eh, it's electric."
Him: "Did you do that yourself?"
Me: Expecting now to be told I was a fool to spend a year and $13,ooo with gas prices now under $2, I simply answered, "Yup." and prayed the light would change.
Him: "Very cool."
Ah, this is nice. Even bad-boy bikers drinking out of a bag on the street corner appreciate an electric car conversion. Maybe things are changing...
Not too much longer down the road the "check engine" light makes a return appearance - and this time it's blinking. I recognize this as the Zilla trying to tell me my pack voltage is dangerously low. I pull off onto a side street and let the car sit while I try to act normal.
After what seems like 30 minutes, but was probably less than 10, the SOC is showing 10% and I'm off again. Slow-ly. I'm now less than 5 blocks from home and decide to go for it.
Once I get home I pop the hood and start reading voltages off the batteries: 12.06, 12.07, 12.11... About 40% SOC, not good.
One battery, #5, was showing 10.96 volts. That's not just dead, that's off the chart dead.
I gave it a little charge at 6 amps to bring it up into the 12 volt range and turned on the Zivan. Everything seemed fine, but, after about an hour, #5 was showing 15.5 volts, (15.6 is the limit) where the rest were all around 13+ volts. I turn off the Zivan and head upstairs.
That's enough for one day...
Sunday, November 30, 2008
Owe you all an update...
I realize it's been a while since I have updated the blog. Over the last couple of weekends I got the batteries almost balanced, I reworked the instrument cluster, got the hood reinstalled and a bunch of minor little things.
 Balancing the batteries has been a huge pain. I did get to learn a lot of things NOT to do.
Wrong.
Some were always getting over charged while others got undercharged - the Equalizers would start blinking and batteries would begin to hiss.
The right way to do this is to bring them all up to 100% first. And measure the voltage THE NEXT DAY - not in an hour or even two hours after charging. I have a couple of batteries that will slowly drop over night back to where they started. Multiple long charges was the only way to get them up to capacity and stay there.
2. I have a good charger for my ICE car. It has a 6 amp and 2 amp setting with an ammeter on the front. After using it constantly, though, I noticed some batteries weren't charging. Comes out the crimp connection on the positive clamp had worked it's way loose. I would connect it up to the battery, read the voltage, plug in the charger and see the voltage rise, but when I returned the voltage was back where I started. At first I thought the battery was being difficult... Then I found the wiring problem.
3. My charger doesn't shut off by itself. To avoid overcharging, I used an appliance timer set to an hour and a half. This was working pretty well until I got too confident and didn't check on it. Naturally, by the time I did check on it, the timer was stuck (it's little motor was overheating) and my battery was overcharged and hissing. The lesson here is to use a timer, but always check - don't assume.
In the end, I got them all above 12.84 volts (100% SOC) and ran the Zivan for a half hour or so. The Zivan did it's pulse charging thing, and everybody appears to have survived.
While all this battery baby-sitting was going on, I did disassemble the instrument cluster to fix the lamp problem and some of the wiring. I was trying to pull 12v and GND from the back of the cluster for the temperature gauge, but it still doesn't work right. My new plan is to grab GND from the dash and 12v from the alternator light (the Zilla uses this as a contactor closed indication, so it's on when ever the car is operational). That should do it. I'll check the ammeter and tach after this.
 The hood ended up being trickier than I thought it would be. First, the box I put the high voltage components in was a little too tall. It fit under the hood with the top off, so I only needed to take less than a 1/4 inch off of it. I had plenty of room, so I went for 1/2 inch just to make sure there were nothing banging when I hit a bump.
I cut the top edge of the front down with my Dremel. The plastic cut easily, but was so hit it would melt back together after the blade passed by. I only broke three blades dealing with this. I decided to cut the sides at an angle so that the back side of the box was not cut - mainly this was to save me time, but it also looked better angled - it looks more like it was designed to go under the hood.
I hadn't thought about the hood prop rod. The stock mount was below the top of the high voltage box, and if I just bent the rod to go over the box, it would hit part of the headlight bracket and never reach the hood. I ended up mounting it to the back of the headlight bracket and after straightening it out, putting a bend in it to lie over the top of the high voltage box when down. Of course, this made the clip that the for end of the rod too low. I ended up using an unused wiring mount to mold down the end of the rod.
The hood went back in place pretty easily - it's aluminum, so you don't need to get a neighbor to help. The only thing that didn't align properly were the headlight covers. Comes out the back side of the covers doesn't have any support, so every time you lean on them, they drop a bit. I carefully finessed these back up into position and it looks like stock.
 Now the only way you know it's electric is from the lack of a exhaust pipe and the buzz it makes as it drives by...
 Balancing the batteries has been a huge pain. I did get to learn a lot of things NOT to do.
- Don't expect that two batteries with similar idle voltage readings have the same state of charge. (I lost a good two weeks learning this one).
- Don't expect a standard battery charger to hold up to charging 13 batteries multiple times over 3 weeks.
- Don't expect your timer to not fail when you aren't watching
Wrong.
Some were always getting over charged while others got undercharged - the Equalizers would start blinking and batteries would begin to hiss.
The right way to do this is to bring them all up to 100% first. And measure the voltage THE NEXT DAY - not in an hour or even two hours after charging. I have a couple of batteries that will slowly drop over night back to where they started. Multiple long charges was the only way to get them up to capacity and stay there.
2. I have a good charger for my ICE car. It has a 6 amp and 2 amp setting with an ammeter on the front. After using it constantly, though, I noticed some batteries weren't charging. Comes out the crimp connection on the positive clamp had worked it's way loose. I would connect it up to the battery, read the voltage, plug in the charger and see the voltage rise, but when I returned the voltage was back where I started. At first I thought the battery was being difficult... Then I found the wiring problem.
3. My charger doesn't shut off by itself. To avoid overcharging, I used an appliance timer set to an hour and a half. This was working pretty well until I got too confident and didn't check on it. Naturally, by the time I did check on it, the timer was stuck (it's little motor was overheating) and my battery was overcharged and hissing. The lesson here is to use a timer, but always check - don't assume.
In the end, I got them all above 12.84 volts (100% SOC) and ran the Zivan for a half hour or so. The Zivan did it's pulse charging thing, and everybody appears to have survived.
While all this battery baby-sitting was going on, I did disassemble the instrument cluster to fix the lamp problem and some of the wiring. I was trying to pull 12v and GND from the back of the cluster for the temperature gauge, but it still doesn't work right. My new plan is to grab GND from the dash and 12v from the alternator light (the Zilla uses this as a contactor closed indication, so it's on when ever the car is operational). That should do it. I'll check the ammeter and tach after this.
 The hood ended up being trickier than I thought it would be. First, the box I put the high voltage components in was a little too tall. It fit under the hood with the top off, so I only needed to take less than a 1/4 inch off of it. I had plenty of room, so I went for 1/2 inch just to make sure there were nothing banging when I hit a bump.
I cut the top edge of the front down with my Dremel. The plastic cut easily, but was so hit it would melt back together after the blade passed by. I only broke three blades dealing with this. I decided to cut the sides at an angle so that the back side of the box was not cut - mainly this was to save me time, but it also looked better angled - it looks more like it was designed to go under the hood.
I hadn't thought about the hood prop rod. The stock mount was below the top of the high voltage box, and if I just bent the rod to go over the box, it would hit part of the headlight bracket and never reach the hood. I ended up mounting it to the back of the headlight bracket and after straightening it out, putting a bend in it to lie over the top of the high voltage box when down. Of course, this made the clip that the for end of the rod too low. I ended up using an unused wiring mount to mold down the end of the rod.
The hood went back in place pretty easily - it's aluminum, so you don't need to get a neighbor to help. The only thing that didn't align properly were the headlight covers. Comes out the back side of the covers doesn't have any support, so every time you lean on them, they drop a bit. I carefully finessed these back up into position and it looks like stock.
 Now the only way you know it's electric is from the lack of a exhaust pipe and the buzz it makes as it drives by...
Sunday, November 16, 2008
Gauges again
I have four main things to finish on the car:
Last week I took a template of the plastic piece I needed to cover the original gauges that I was keeping (tach, speedo and idiot lights) the temp, fuel and oil pressure gauges were replaced an ammeter, State of Charge meter and a temperature gauge for the Zilla. And yes, I could have reused the old temperature gauge, but I think it would have looked funny.
 At any rate, The plastic cover fit pretty well it just needed a few adjustments with the Dremel. I hooked up light kit and fed the wires through some holes I cut in the sides and crimped on some connectors. The lights had to be connected to the one in the instrument cluster so that the dimmer would work right. I traced out the wires and soldered a pair of flywires to the circuit board for these. These are the two black wires running across the back of the cluster in the picture. So far so good.
I had fed the wires through the firewall and up to the where the cluster goes earlier, Now I just needed to crimp connectors on them. Here's a tip: make the connectors all the same just in case you mess up the wiring. I made all the instrument connectors female and all the wire side male. And, I thought the blue went to the SOC meter, when it went to the Ammeter... Works out nice when you plan to make mistakes. ; )
 Once I got them in, the SOC meter started working, but nothing on the ammeter. I tried reversing the polarity but still nothing. The temp gauge didn't move, but the Zilla was still cool to the touch after a couple of drives, so maybe it was okay.
Next I tried the lights and, the temp gauge went up when the lights went on. Hmmmm, must have the ground or the positive leads wrong. When I turned the key on with lights lit, the temp gauge bottoms out like the polarity is wrong.
So, of the 5 gauges...
I had a nice visit with a fellow Miata converter. He is using an ADC with a Curtis and 15 8 volt batteries. Funny thing is, he lives about a mile from me. What I thought was really interesting is that he took his gas tank out from the top - he cut away the sheet metal with a sawzall and lifted it out. Pretty cool. I'm going to try to go look at his car later.
- Get the full charge on the batteries. This first requires that I get them balanced.
- Install the instruments
- Fix the clutch (new on the list since yesterday)
- Attach the hood and prop rod (this one should be easy)
Last week I took a template of the plastic piece I needed to cover the original gauges that I was keeping (tach, speedo and idiot lights) the temp, fuel and oil pressure gauges were replaced an ammeter, State of Charge meter and a temperature gauge for the Zilla. And yes, I could have reused the old temperature gauge, but I think it would have looked funny.
 At any rate, The plastic cover fit pretty well it just needed a few adjustments with the Dremel. I hooked up light kit and fed the wires through some holes I cut in the sides and crimped on some connectors. The lights had to be connected to the one in the instrument cluster so that the dimmer would work right. I traced out the wires and soldered a pair of flywires to the circuit board for these. These are the two black wires running across the back of the cluster in the picture. So far so good.
I had fed the wires through the firewall and up to the where the cluster goes earlier, Now I just needed to crimp connectors on them. Here's a tip: make the connectors all the same just in case you mess up the wiring. I made all the instrument connectors female and all the wire side male. And, I thought the blue went to the SOC meter, when it went to the Ammeter... Works out nice when you plan to make mistakes. ; )
 Once I got them in, the SOC meter started working, but nothing on the ammeter. I tried reversing the polarity but still nothing. The temp gauge didn't move, but the Zilla was still cool to the touch after a couple of drives, so maybe it was okay.
Next I tried the lights and, the temp gauge went up when the lights went on. Hmmmm, must have the ground or the positive leads wrong. When I turned the key on with lights lit, the temp gauge bottoms out like the polarity is wrong.
So, of the 5 gauges...
- The tach doesn't work, but it lights up
- the SOC works, but the light is too close to the face and lights a corner of it up
- the speedo works and lights up fine
- the ammeter doesn't work, but lights up
- the temp gauge is mis-wired, but it lights
I had a nice visit with a fellow Miata converter. He is using an ADC with a Curtis and 15 8 volt batteries. Funny thing is, he lives about a mile from me. What I thought was really interesting is that he took his gas tank out from the top - he cut away the sheet metal with a sawzall and lifted it out. Pretty cool. I'm going to try to go look at his car later.
Saturday, November 15, 2008
Drive time!
I finally got the car on the road today! Maybe I should have waited until all the batteries were equalized and fully charged, but I didn't.
I've been stealing time this week charging the batteries one at a time and trying to track down an error the Zilla was giving me. I learned 2 things:
#2 Don't connect the DC/DC converter to the switched side of the contactor or the Zilla won't be able to pre-charge properly.
#1 (most importantly) don't bug Otmar with these kinds of questions unless you bought the Zilla directly from him. I thought it was something stupid I did (which it was) but it took too long to sort out and Otmar got a little peeved that I was wasting his time when technically I should have gone to Ryan at EV Source for help.
I was pretty excited to get it back on the road again, so took it for a quick run, then I had my daughter get in the car with me, then my wife wanted to drive it around the block...
I'll try to edit the videos and get them up to YouTube this week.
A couple things I noticed while driving:
- the clutch isn't working. Not a big problem as there isn't a lot of shifting at speed in an EV unless you are on the highway, which is not in my immediate plans.
- it's pretty fast. My runs were uphill at a sight grade and I could easily burn rubber
- I kept thinking i had a flat. The tires are pretty sticky and at low speed all you hear is tire sounds. That with the manual steering (with an extra 100+ pounds in the nose) makes it feel like the tires are flat. Once you step on it, though,the feeling goes away.
- it makes a nice wooshing/whirring noise like a jet but not nearly as loud. Not sure how much of this are my tires...
I don't have the gauges in it, so I won't be taking it to the Green Fair we have today. I don't want to have to tow it home.
Sunday, November 9, 2008
Little this, little that...

Didn't have much time to work in the car this weekend, but I did sneak off to the garage a few times. The constant battery charging was the major activity this time. The pack is out of balance and I find myself charging each battery with a 6 amp 12 volt charger that needs constant monitoring. I'm trying to get them all within a tenth of a volt so that the Zivan and BEQ1s can do their job, but so far this has proven - what's the word - elusive.
At the moment, I have two in the 12.6 range five in the 12.7 range, 4 in the 12.8 range and one lone cowboy hanging in around 12.92. My plan is to bring the 12.6s into the 12.7 or 12.8 range and hopefully, that 12.92 will drop into the 12.8 range on it's own. If not, I may jumper it to the SLI battery and do the headlight trick again...
I'm a little concerned that one of the 12.6s doesn't seem to hold a charge well, but won't worry about it too much right now.
Both the hissing batteries seem to charge up and hold a charge well enough, so we may be okay there.
I did take a trip to a plastic store to have the cover for the gauges made. I made a template out of construction paper. It should be ready on Tuesday.
I also got some 9' of wire for the ammeter and SOC gauges. The wire that comes with the gauges is 16 gauge stranded, and I let the guy at the hardware store talk me into 18 gauge solid. His argument was that it was to short a run for a resistance to be built up. Maybe so, but getting the solid wire into the wiring loom was a major hassle. Next time I'll order 16 gauge stranded on the 'net.
I've been noticing the Zilla hairball is showing an error and hooked up my laptop to see what it was. It's error 1131 - Shorted/Loaded Controller during precharge. There's no info in the manual, or on line on how to troubleshoot this, but I have faith that Otmar will help me out.
Thursday, November 6, 2008
Out of balance (still)
 My new Fluke came in the mail yesterday. Now I can see what's really going on with my batteries and it aint pretty.
Last time I ran the charger I noticed two batteries where hissing. This is bad news for AGM batteries as it means the valve is open and they are off gassing. Since they are sealed, there is no way to refill them. I did some checking on line and some people seem to think that it doesn't necessarily mean the battery is bad.
We'll have to see.
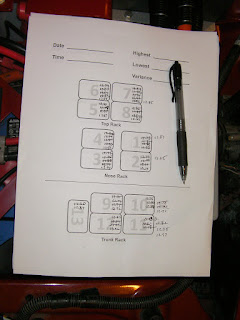
 Here is the last set of reading I did:
#1 12.38
#2 12.59
#3 12.36
#4 12.41
#5 13.13 (hissing)
#6 12.63
#7 12.50 (hissing)
#8 12.67
#9 12.60
#10 12.45
#11 12.66
#12 12.44
#13 12.45
I've been emailing Ken at HotJuiceElectric (the makers of the BEQ1) who has been real helpful.
He's telling me the BEQ1s won't balance the pack, but keep it balanced. His suggestion is to charge them all up one at a time until they show 13.2 volts each. I was hoping to avoid this since it may take me DAYS to get them to this point, but it looks like I won't have much choice in the matter.
Ugh.
Sunday, November 2, 2008
Out of balance
I'm having trouble getting the batteries in balance so that they can be charged.
When I fire up the charger, I get some BEQ1s lighting up yellow and in 90 seconds one goes red indicating overheating.
Some batteries are around 13 volts and some are just under 12. They should be 13.2 volts when fully charged, and they are shipped charged. I blame this on my shorting out of the nose rack that melted one of the batteries. I think that drained the other 3 in the pack and the replacement battery has a higher charge.
My plan is to charge the low ones one at a time with a 12 volt charger and drain the high one a bit by connecting it to the SLI battery and turn on the headlights.
My cheap meter isn't exact enough for me to tell what's really going on, so I ordered a Fluke on eBay.
More on this later...
 While I was charging and draining the batteries I did some more wiring.
I traced out the wire to the Tach and hooked it up to the Zilla's Hairball and ran a new wire from the dash down to the hairball for the Check Engine light. The stock wiring for Check Engine goes to the ECU, which was located under the front floor board on the passenger side. Doesn't do me any good there, so a new wire was in order.
I did a little more dressing of the wires after that.
With these last two wires hooked up I could finally chop out the rest of the wiring harness. This actually was kinda fun. After chopping, I wrapped up the ends with tape so that they won't short anything out. It looks a lot cleaner and there won't be anything to rattle around when I hit a bump.
Saturday, November 1, 2008
Remote charge indicator

I didn't have a lot of time to mess with the car this weekend, but got a bit done on Saturday. I've been having troubles with balancing the battery pack (one battery in the top rack is overcharged), and it occurred to me that this may be an answer to another problem. On and off, I've been looking for suitable wiring to extend the temperature sensor and remote LED for the Zivan so they reach to the back of the car. Since a battery up front is running hot, I could put the sensor on it and only have to extend the LED indicator. The LED is 3 color, so it needs 3 wires. I guesstimated I needed to add 6 feet so I cut 7 feet of 4 pair , doubled up the leads for less resistance and soldered them to the original cable. I put in a pull string when I pushed the 220 volt cable through the PVC pipe that acts as the wiring conduit, so pulling in this cable was pretty easy... I should have cut 8 feet, though because I only had about 6 inches to work with when soldering the wiring to the LED.
It all worked out though. It looks pretty slick as the whole cap lights up with the LED, though you can't really see this in the picture because of the flash. One thing I found out - the indicator is disabled on the charger when you plug in the remote. Would be nice if they both worked.
Thursday, October 30, 2008
Almost legal

I talked my wife into giving me a lift to the DMV this morning to register the Miata. You are supposed to register the car right after you buy it, but since it wasn't going anywhere, I didn't think it was a problem. The DMV doesn't see it that way and hit me with about $36 in fines.
Oh well.
They didn't have any problem with it being electric. The woman working the desk said she just needed to enter the letter 'E' someplace to indicate it was electric. I have to schedule an inspection to get the requirement for smog (emissions) checks waved. I think they want to poke around to be sure I'm not hiding a gas engine somewhere under the batteries ; )
They gave me a temporary permit that's good until January 31 - which explains the big number '1' in the pink sticker on the windshield.
Sunday, October 26, 2008
Wiring, wiring and some charging questions...

I started out today by returning the crimper and vacuum tester, then a quick trip to Lowes for some electrical parts for adding a 220 outlet. I was originally thinking of going with a 30 amp 110 outlet for the Zivan, but the distributor recommended 220vac for the input saying it would make the Optimas last longer.
When you can choose both the outlet and the inlet (the part on the car) you have a ton of options. I decided to go with the L6-20 because it's locking (no cables falling out by mistake) it's reasonably priced and I could get a pre-made 15' cord for $25. BTW, there is a proposed standard inlet/cable combo that I did consider - but it's way expensive. I figure if it does become a standard, I'll make a cable up.
Putting it all together was straight forward. Plugged the car in, and the Zivan beeped a couple times, it's fans spun up and charging commenced. A few of the BEQ1s had their yellow LEDs lit, which made sense because the pack shouldn't need much of a charge. Then after a bit one lit it's red over temp LED. This BEQ was hot and the manual says to shut the charger down when this happens. I did a little trouble shooting and determined that this battery was the replacement for the one I toasted. It shows 13.3 volts where the rest of the pack is showing 11.9 to 12.4 volts.
So, until I figure out a remedy, there will be no charging.
Next I cleaned up the under hood wiring. I put in a split loom over the wiring to make my wiring look more stock. A word of advice - put the loom in first, then run the wires. Do not put the wires in then try to squeeze the loom over them - like I did. It was a long frustrating experience, but I finally got it in place and it looks good.
 I had a little more time, so I relocated the horn. The old location would hit the nose rack, so I drilled a hole inside of the bumper in the gap between the sides of the nose rack. Fits real nice and the stock wiring even reaches.
Sunday, October 19, 2008
The charger

The big job on Sunday was getting the Zivan installed. As you might recall, I made a mockup of the charger out of a cardboard box and found that it fit nicely over the nose rack. Cabling-wise, this was a lot better than installing it in the trunk (as I was planning to do with the Manzanita Micro charger) because the most positive and most negative ends of the battery string are right there.
To get it installed I needed to:
1. design, bend and weld the mounting bracket
2. paint said bracket
3. wire the output cables to the battery pack
4. crimp the cables to the supplied Anderson connector.
5. wire the 220 vac cable from the charger port to the charger input.
I started by laying some old floor mats over the batteries in the nose rack. I was then able to remove the bracket I made for the high voltage component box without worrying about shorts.
The bracket design was a bit tricky. The passenger side was the easy part, I just needed to make another straight bracket like I made for the high voltage box bracket, just bent in the opposite direction. But the other end, (where you see in the picture the the red and black cables plug in) was trickier. I could have run a straight piece of steel under the charger mounts, but it would have had to bolt to the airbag sensor, and I didn't want to mess with it. So, I used a bolt hole near the center of the cross brace (to the passenger side of the airbag sensor) and ran the steel at a 45 degree angle to the box bracket. This took care of one of the charger mounts (and stiffened up the box bracket too). The other charger mount was close to where the bracket attached to the middle bolt on the nose rack. I decided to weld a tab there to hold the mount. So designing it wasn't so bad, and neither was the welding, drilling or grinding. The painting went pretty smoothly too, though it was a bit windy in the back yard...
In between squirting on the coats of primer and paint, I made the output cables up. I had bought two 60" battery cables from Kragen to use on the DC/DC converter and the charger. For the charger, the red lead went to the terminal of the most positive battery - which is just to the driver side of the charger. Black lead goes to most negative - which is the input to the contactor (you don't want the switched side of the contactor or you will only be able to charge the car with the key switched on). The contactor is in the box mounted also to the driver side of the charger, so I could have got away with about a foot of cable, but I had plenty, and thought it would be better to have enough cable to unplug it easily and put it aside. You can see in the picture there is at least 2 feet of cable there.
I was concerned about the Anderson connector. These are special 2 conductor connectors designed for high voltage. I thought my wire might be too thick for the connector at 4 gauge instead of the usual 6 gauge. Comes out it fit right in and crimped solidly with my hand crimper (not the big one I borrowed).
Once the paint was dry, I removed the mats over the batteries and carefully put the brackets in place. the holes lined up fairly well, and it even looks pretty good.
Next was wiring up the input cable to the 220 volt line. The cable from the charger port was a little shorter than I liked - it only made it to the back of the Zilla. It would have been nicer if it had been a foot longer, but it was long enough to strip back the 3 wires. Being that it's a standard US cable, the wire code was black, white, green - green being ground and the black and white connecting to hot leads (actually, each are 110 vac, just 180 degrees out of phase to make 220vac). Anyway, the Zivan, being Italian, did not have the same color code. This was a little disconcerting. But after thinking about it, I realized that only the ground mattered, the other two leads just need to be connected to 110 vac each, it doesn't matter which one. I had considered using a connector so that I could easily disconnect the charger from input power, but I couldn't think of when I would need to disconnect it. So I hard wired it with some crimp on butt connectors. A little tape and it was good to go.
Only wish I had the 220vac outlet installed in my garage so I could plug it in.
That will have to wait for next weekend.
Vaccum pump resolved

I was having trouble connecting up the vacuum pump for the power brakes.
Actually, it worked fine - it was just working too often - constantly cycling on and off, which indicates that there is a vacuum leak somewhere. The pump is mounted under the passenger side of the top rack beside the motor, so I have to pull out a couple batteries out of the rack to get to it. Most people connect the pump to a vacuum reservoir (essentially a tin can with a check valve and a hose fitting) which stores a little more vacuum than the booster alone. I've used one of these on a gas car a while back and am skeptical that they make any real difference, so decided to skip this piece and connect the pump to the vacuum switch and to the booster. I had a T fitting to hook this up and, it looked good, but, as I mentioned, didn't work real good.
One great help when dealing with this is having the right tools. I don't. But AutoZone does. They are a car parts retailer in the US and they have a great tool loaner program. Last week I drove to one of their stores and, after leaving a deposit, walked off with a hand held vacuum pump complete with a gauge.
I quickly found out the pump leaks! When it shut off the vacuum drops to zero. I got a check valve from Kragen (sorry AutoZone, but Kragen is in walking distance...) and after plumbing it in, it made no difference. After a few checks it was clear that the check valve didn't stop the leak. A little more testing and it was clear that the check valve was defective.
Later, while working on wiring up the charger, I had an epiphany. I didn't need another check valve, I just needed to move the stock one to the other side of the vacuum switch. The stock check valve is inside the hose that comes off the booster. So I pulled it off and replaced it with a regular hose. The check valve hose got moved to between the T fitting and the pump and voila. Works fine.
BEQ1s

I got a good 8 hours to work on the car today. I'm in the home stretch now, and anxious to get it.
I got three major things done, so, three blog entries...
First was the BEQ1s.
As you might recall, the BEQ1s are battery equalizers which help keep the batteries from over and under charging which makes the pack last longer. I couldn't get equalizers for the Manzanita Micro charger I planned to buy, so I went with a Zivan that worked with the BEQ1s.
The BEQ1s are compact little black boxes (literally) that are easy to install - they just bolt to the posts of batteries. They have LEDs on them that light to show they are working or that there is an error. I ordered a couple of long terminals because two of the one for the front rack could be covered by the charger making it hard to see the little LEDs. HotJuice Electric (the maker of BEQ1s) was more than happy to help me out.
Friday, October 17, 2008
Undercar cabling - take 2

Got a little time tonight to clean up something that has been bothering me. Back when I was planning this project I intended to use a PVC pipe to run the wiring from the front battery racks to the rear. After seeing a few cars not using any conduit, I changed my mind and decided just to tie wrap up the cables to the former exhaust pipe mounts. As you might recall this didn't work so well - the cables sagged enough that they could catch road debris and they weren't protected from said debris that might, over time, damage the cable insulation.
I got a comment pointing this out on the blog and an email from a Spec Miata racer explaining the damage to his exhaust system that he has personally seen. Plus he pointed out that in rare cases one of the axles could break free from the differential which could potentially wallop the cables into a heap of sparks.
So, back to plan A.
First I got a short length of 1.25" diameter PVC pipe just to protect the cables around the axle. It was hard to get the cable ends through the pipe and it didn't do anything for the sagging (naturally).
I returned this pipe and got a 10' long 2" diameter conduit - which was of course too big to make it under the axle with any ground clearance.
I returned this pipe and got a 5' long 1.5" diameter pipe - which was about 2.5' too short...
I returned this pipe to Judy (we are on a first name basis now) and got a 10' long 1.5" diameter pipe. It was long enough, it was wide enough it was small enough, it was just right...
The cables went into it real nice and I added a couple of 45s at the end to bring it right into the battery rack. This also let it sit down a little lower than if it was a straight pipe.
After I got the cables in it, I pushed through the cable for the 220vac line from the charging port to the charger.
Looks pretty clean, and definitely a lot safer.
Sunday, October 5, 2008
No con-duit

Another difficult day was in store for me this morning. I made an early trip to buy a short length of black PVC pipe to protect the cables near the axles and a proper hose fitting for the vacuum pump.
I'll spare you the details and just say, the fitting didn't fit, the pump still runs, but I still think the fitting is the culprit here.
I got a 16" section of 1.5" PVC pipe to use as a conduit below the axle. It was pretty difficult getting the terminal (clamp) ends of the cables through the pipe while lying on my back and reaching over my head. Eventually I got it. I shoved in the 220 VAC cable from the charger port too, then I tie wrapped it up and reconnected the terminals to the batteries.
I spent some time looking at it from under the car and it just looks sloppy. These battery cables are pretty heavy, so even though they are tie wrapped nice and tight, they sag. You can see in the picture a loop of orange hanging down toward the front of the car. Ugh.
So, after much gnashing of teeth, I decided that I'll be using a conduit for the whole run. I'll need to pull out the cables from the front (where they are terminated on lugs) and pull them through.
That will be next week.
Saturday, October 4, 2008
Not the way to do it.

I got back from a business trip late Friday night and though a little jet lagged, went to work on the car late Saturday morning. While I was out two boxes arrived - one with the charger port and wire and the other with 13 BEQ1s.
I decided to work on the charger port. I went with twist lock cables rated at 20 amps at 220 volts. the charger port is called an 'inlet" - like an outlet, but with the male connector inset. The connector won't be live, so having the connectors exposed is not a problem. I also mounted a remote indicator for the Zivan charger beside the charger port. This way you'll know how the charger is doing without having to snoop around under the hood.
Looks good don't it?
Well, it wasn't easy. My recommendation is to mount the indicator at least a 1/4 inch farther away from the latch release (that black button thing you see to the right of the port). I didn't think the whole thing through (I blame the jet lag) and mounted the indicator too close to the latch. I had to stick a washer behind the latch release mechanism so that it didn't protrude so far, then cut off the latch on the door assembly, since it hit the side of the indicator and wouldn't close, then had to rig up the bump stops with rubber cap extensions so that the door would pop open when released.
Could have been an easy job if I had thought it through. Took me a couple hours to get the door to work. Needless to say, the wiring didn't get done.
Friday, October 3, 2008
It's Alive video on YouTube
Finally got the video of the first drive edited and uploaded to YouTube.
http://www.youtube.com/watch?v=Q22T8DrB7yE
I'll let you in on a little secret... (the first scene is backwards). It looks like I'm driving the car out of the garage, but actually, I was backing it in. You can see how I'm looking over my shoulder as I drive. The other odd thing is how the car won't make it back up the hill. The Zilla was resetting because the 12 volt battery I was running it off of (I didn't have the DC/DC converter in yet) was too low.
And, before you ask, those wheels came with the car when I bought it.
Sunday, September 28, 2008
DC\DC converter and vacuum pump
Back to work.
I hated to remove some of the batteries to do the Iota wiring and install the vacuum pump, but they were in the way. I switched off the breaker and carefully removed the 3 cables that connected to the passenger side batteries on the top rack and put the covers on the posts.
One bad habit I've gotten out of is laying tools on the car. I recommend using your pockets or a tool belt or just dropping them on the floor near by. Even if you lay a wrench on a rubber fender covers (mine ironically says Isky Cams on it), it can still find it's way into your battery pack. Same applies for the extra nuts and bolts in your hand as you tighten a nut.
I bought some one red and one black 60"4 gauge wire at a Kragen for $7.99 each. It already has lugs crimped to it and the 60" should cover my needs for the Iota and the Zivan. Most people use 6 gauge, I think, but 4 is 2 better, right? and they didn't have 6 at the Kragen.
I bolted a red cable to the big positive lead that had gone to the starter and bolted the black negative cable to the chassis as a ground. Too easy. I cut the AC cord and crimped on a lug for the most positive lead on the battery pack and extended the negative lead ('cause it was 4 inches too short) and crimped a lug on it and connected it to the switched side of the contactor.
Problem is, I can't test it until I reinstall the two batteries I pulled, so I'll need to wait until the vacuum pump is working.
The Vacuum pump bolted up to my bracket nicely and I wired it up to the vacuum switch (which turns the pump on when the vacuum is low) and hooked the hose up to a T fitting to connect the pump, switch and the brake booster. When I turn the key on the pump runs (yay!) and then turns on and off repeatedly (ugh). Must be a vacuum leak. I checked and retightened the fittings, but there was no change. I added a check valve(left over from another car project) in line after the switch which helped a little but not much. Back to Kragen for some new vacuum lines and the problem persists.
Hmmm.
Later I checked my add-on check valve by blowing and sucking on it (the things you have to do!) and it leaked. If that doesn't fix it then it may be the switch.
I'll deal with this later...
Sunday, September 21, 2008
Its alive!
 Today is our annual block party and my latest deadline for getting the car running. Previous dates were Mid-June, July 4th, the August SFEVA club meeting, Labor Day and now the block party. As the dates were slipping, so were the requirements. I no longer planned to get the car “done,” just running. All I want to do is get it running, that’s all – no charger, no gauges, no DC/DC converter - just running.
I spent an hour or so this morning getting the top rack back into the car and re-assembling the brackets and the Zilla and cables. I needed to make sure all the cables are tight and aligned, so this took some time. I also did some more shrink tubing on the cable ends, even though the lugs are hidden in the box.
Later, I snuck out of the block party to do the battery cabling. I was a little concerned about this after my meltdown, so I put on rubber gloves, safety glasses and tightened up one cable at a time being careful that neither end was touching anything other than the battery post where it belonged. I taped up my ½ inch open end wrench so that only the open end section was exposed to insulate it in case I dropped it. I had the circuit breaker switched off and triple checked the Zilla and contactor wiring to make sure there were no shorts in the cabling. This was nerve racking work, but I got through all three racks without incident. After a sigh of relief I sat behind the wheel and turned the key. I don’t have the instruments installed, so all I could do was listen to the contactor close to indicate the car was working. I gave it a little juice and it moved! The Zilla hisses a little at low speed so that was a good indication that it was working.
 Since we had the street blocked off for the party I decided to take it out for a spin. My wife captured it on video which I’ll edit down and post on the site later – maybe YouTube too. I can’t tell you what a relief it was to have the car running, but it did not want to go back up the hill. It would nudge a long then stop then nudge a long again. I got it back to my driveway and after answering questions and getting congratulated I got out my laptop to see what the Hairball thinks is wrong. It gave me an error code saying that the SLI battery was too low and the hairball was shutting down. Figures. SLI stands for Starter, Lights, Ignition – this is the battery that came with the car to start the gas engine. It had been sitting a year and, of course, I never thought to charge it.
 At least it’s an easy fix.
Saturday, September 20, 2008
Paint and a few wires

Today primered and painted the top rack in my backyard. We are dog sitting for some neighbors this weekend. Hope I don’t have dog hair on my rack.
While the paint is drying between coats, I ran some wires from the hairball out to the box where the contactor sits. I need a pair of wires to turn on the contactor (actually only need one hot and a ground) and a pair on the power terminals of the contactor so the Zilla knows that it’s on. I will also need a pair of wires for the Zivan to tell the Zilla that the car is charging. This is intended to stop you from driving away with the car still plugged into the wall. I’ll hook this up later. I used a 4 pair network cable and crimped some ends on it. I’m not sure what gauge wire is needed for the Hairball (there is nothing in the manual, and I didn’t want to bother Otmar with more questions right now). I believe the wire is fine, and if not, I can double the leads up, or run something else, not a big deal.
Friday, September 19, 2008
More Hairball wiring

I've got some of the wires figured out for the hairball, but the one that's stumping me is the starter wire. I traced it out in the wiring diagram, and sure I have the right wire, but, with the key on it gives me 12 volts and when you turn the key to start, it drops to zero. It's backwards. I tried tracing it back from the clutch switch (the interlock that makes you step on the clutch to start the motor) to the relay under the hood, to the fuse block, to the wire, and they all are backwards. Very strange. Maybe it has to do with the ECU being removed?
Anyway, today I decided to stop messin' around and went to the key switch, where the voltmeter showed that the wiring worked as expected - zero volts until the starter switch was activated, and then it hit 12 volts. I used a tap to connect a new wire right of the switch and down to the Hairball. In the picture you'lll see a bright red wire going to a yellow tap. Why didn't I think of that before?
A little grinding
I took a couple hours today to clean up the top rack with a grinder to get it ready for paint. There are a lot of odd angles and brackets on this one, so it took longer than I expected.
Saturday, September 13, 2008
More words about welding and cables
 Got a few things done today. I welded on the bracket for the circuit breaker to the front right side of the top rack. I was going to put it with the lever facing up to make it easy to trip when working on the car, but the instructions (and later the tech support people) said that for proper operation it needs to be mounted up right. It's not in the easiest place to reach, but my plan is to connect a cable to it so that it can be tripped from the driver seat.
Next I welded on two brackets on the lower left side of the rack for the vacuum pump. This produces the vacuum needed for the power brakes to work. It will mount under the rack in the space to the left of the motor.
 After the welding was done I finished up the cables - added the shrink wrap to the ends, the proper colored insulating boots and tightened them down nice and snug.
  I made the replacement cables up (to make up for the ones I melted) and added the two l o n g ones that connect to the rear rack. One goes from the circuit breaker to the positive terminal in the rear and the other comes from the last negative terminal up to the contactor. I was worried I would run out of cable, but I have a good 12 feet left of the fifty feet I bought.
Running these cables was a little tricky. I decided to tie wrap the cables to the exhaust hangers, which worked out well. I used some foam rubber pipe insulation to soften the connections where the cable was tied to the rear suspension and the front subframe.
Thursday, September 11, 2008
Zivan charger is in

After a lot of research and a few phone calls, I changed my original plans to use a Manzanita Micro PFC-20 charger and ordered a Zivan NG3. In the picture you see the NG3 beside the cardboard mock up that my daughter and I made. The Zivan is smaller, lighter and cheaper, but only works on one voltage – in my case 220VAC is what Zivan recommended. I still want to have 110vac charging available for “opportunity charging” (in a parking garage or friend’s house) and am told another small charger that is compatible with the Zivan is on the horizon.
The reason I didn’t go with the PFC-20 had nothing to do with the charger itself, but with the battery regulators. Manzanita Micro use to make something called Rudman Regulators they insured that the battery charges were in balance across the pack. Batteries each are a little different chemically and when charged in a string they can be undercharged or overcharged, reducing performance and their life span. A regulator will sit on top of each battery and make sure it doesn’t get overcharged and by doing this, insures other batteries don’t get undercharged. I’m a believer in battery regulation but the Rudman Regulators are no longer available. I tried to find something else, like PowerCheq, but they won’t work with 13 battery strings or with racks that a separated by more than a few feet. I did find a company in Austin making a nice regulator called a BEQ1, but it is designed to work with the Zivan. So there I am.
I’ll be building a bracket to place the Zivan above the nose rack in the near future.
Wednesday, September 10, 2008
Web site up(dates)
Well, the site is back up and I decided it needed a little updating.
I added some info about a bea-utiful Miata re-body kit from Simpson Design and added some graphics.
I said a little updating, right?
Also, unrelated to the web site, I order a Zivan NG3 charger and a set of BEQ1 battery equalizers. And Monday I was able to do some programming of the Zilla's Hairball.
More on this later...
It's getting close.
Tuesday, September 9, 2008
Web site down
I downloaded Chrome - the new Google browser - because I wanted to see what the web site looked like. I got an error 403 message when I hit the site. Hmmmm.
Of course my first thought was that Chrome was to blame, but when I tried it on Firefox and IE6 and got the same result, I realized it was my hosting service.
I sent them an email and they quickly replied:
Hmmm.
Of course my first thought was that Chrome was to blame, but when I tried it on Firefox and IE6 and got the same result, I realized it was my hosting service.
I sent them an email and they quickly replied:
Our system administrators are currently carrying out a server maintenance on the machine where your account is hosted on."more reliable system that will hopefully cause less trouble."
They will have it upgraded to a more reliable system that will hopefully cause less trouble.
The upgrade should be over after 12-15 hours.
We apologize for the inconvenience.
Hmmm.
Thursday, September 4, 2008
Hairball wiring

I had an hour of quiet after work and decided to start on wiring up the hairball. The hairball is the device where the low voltage wiring connects to the Zilla. I think it's also the brains to the Zilla, the controller of the controller so to speak. Anyway, with the help of my wiring diagram and a little sleuthing, I was able to locate the starter wire, a wire that the key controlled in the "on" position, the alternator light on the dash, and the Tach (I think - need to check on that one). Most were long enough to reach to the hairball, but a few needed a little extension. I also connected the Pot Box (the throttle control) to the hairball.
That's as far as I got.
Tuesday, September 2, 2008
Stuff in the mail...
Got my terminals delivered this morning. These are the replacements I ordered for the ones that got toasted. I also forgot to mention that the replacement Optima was delivered Friday AM. They took the damaged one back for recycling.
Monday, September 1, 2008
The box

Over the three day weekend I was able to get a little work done on the car. I decided it was easier to put the high voltage components into a box rather than try to find a place to mount them each and then try to insulate all the connectors. I bought a 6"x6"x4" plastic junction box at Lowes which was big enough for the main contactor (the relay that acts as the main power switch) and the shunt for the ammeter. The only other component that is high voltage is the Zilla, but I'll deal with insulating it later. Next, I needed to mount the box. I planned on keeping it as close to the Zilla as possible so that the wire runs were short. I built a mount out of 1" flat steel that connected to 2 of the nose rack mounting bolts and to one of the radiator mounts on the car. After the mount was done, I figured out where the cables were going to run into the box and drilled some holes. Next, I cut and crimped the cables. I was hoping for nice straight runs, but shirt cables, you don't get much flex for pretty "S" bends and the like. Still looks good.
I have 4 cables left - one to the circuit breaker (that I plan to mount on the upper rack near the Zilla), one to the rear pack from the breaker, one back from the rear pack to the contactor and lastly, a replacement for one I fried.
I should get a box this week with the needed terminals.
Sunday, August 24, 2008
The meltdown


Is it better to be smart or careful?
In my case, I was neither, or maybe I'm guilty of thinking I was smart, and careful.
I'm not sure exactly how it happened, but I do know that I had my cables laid out on the batteries on the nose rack. I had made the cable from most positive (the + terminal at the beginning of the string) to the the Zilla B+ terminal and the cable that connects the nose rack to the motor rack. I was measuring the cable that interconnected two terminals of the motor when it happened.
There was a loud snap.
Sparks flew.
Smoke filled the air.
And the smell of something burning.
I quickly pulled a sparking cable off the battery rack it was touching, and it stopped.
After the smoke cleared the cursing began.
Evidently, the Zilla cable that was just set in place slid off the terminal and touched the rack. A 5/8" open end wrench qas touching the rack and a cable. Enough of the cables made contact to complete a dead short across the batteries frying one of them. The terminal was melted away, as was a piece of two cable clamps and my 5/8" wrench. There was what appeared to be gray paint splattered around, but it wasn't paint, it was the lead post that vaporized.
I would like you all to think I'm brilliant and don't make mistakes, but in reality, neither is true. I make mistakes just like everyone else. So the message for this post is: don't be smart or careful, be safe. Don't think it won't happen to you or that you can just be careful - avoid the situation entirely by not taking chances - be safe.
Saturday, August 23, 2008
It takes a village...

Sorry for the cornball title, but I wanted to mention something about the EV community. There are a lot of knowledge people out there willing to help answer your questions, loan you a hand or, in my case, a tool. I've gotten to the point where I need to start making up the high power cables - these are the ones that connect the batteries together in one long series string and connect up the main contactor, fuse, breaker and controller. To make these cables, you buy a roll of fat cable (I used 2/0 welding cable), some terminals (lugs and/or cable clamps) and then crimp them on the cables. A special tool called a cable crimper is needed to do this. You can get an inexpensive hammer crimper for $35 all the way up to a ratcheting hex crimper for around $300. In my research found that most people recommend the hex crimper (the ratcheting part is a nice addition, but not necessary) - but these run well over $200 and how often are you going to use it? Since I belong to my local EAA (Electric Auto Association), I decided to see if I can borrow one from a fellow member. I was overwelmed at the response. People offered to deliver it to my home, to meet me after work, to come over and help me crimp the cables over the weekend - amazing!
So I was able to borrow this expensive and amazing tool from a fellow EVer, no questions asked.
The crimping was kinda fun. The tool takes some muscle, but the results were clean and professional looking - if I do say so myself.

Friday, August 22, 2008
No more Zillas?

Big news today - Otmar is calling it quits. He evidently is having health problems related to running his business and looking to sell out.
Zillas are generally regarded as the best DC EV Controllers available. I would hope that someone reputable will take it over and keep these outstanding products on the market.
Read all about it on the Cafe Electric Blog:
http://www.cafeelectricpress.com/blog/?p=45
Tuesday, August 19, 2008
Keeping busy

My family was out of town tonight. Do you think I read a book, or watched some of the Olympics?
Nah, I worked on the car...
First I mounted the potbox - this is the electronic throttle that tells the controller how much juice to give the motor. I mounted it on the firewall behind the windshield washer reservoir. I thought about a number of ways to connect the accelerator cable to the lever and ended up using an electrical lug crimped to the cable. I then wrapped the extra cable around the mounting screw and attached it to the lug with a mini cable strap - this gives me a little reassurance that if the crimp comes loose that the cable loop will keep it working. Furthermore, since I didn't remove the end cap from the cable, if the crimp comes loose AND the mini strap breaks, the end cap won't get pulled through the lug, keeping the potbox working, though not as well.
Redundancy is good - double redundancy is even more gooder.
Sorry - I took the picture before I did the double redundancy stuff.
Next I drilled out the temperature sending unit so that it would fit under one of the Zilla's water fittings. The sending unit comes with a 1/4 lug, but I needed it to be 3/8". A little drilling, a little filing a and a little Dremeling and voila.
Lastly, I flipped the cover over on the Zilla so that the graphic was right side up. I know, but it was bothering me.
That's enough for one night.
Saturday, August 16, 2008
brackets and mounts


Saturday I got to do a little bending and welding to finish off the mounts for the Iota and the Zilla, plus I got the battery straps mounted on the motor/cowl rack.
I wanted to attach the Zilla using a separate bracket so that other brackets could be used if another controllers was called for. The braket mounts to the rack, one of the rack brackets and a miata hole near the shock tower. I used flat head machine screws to that the bolt heads wouldn't interfere with the Zilla.
The Iota was originally going to mount with a bracket, but after some experimenting I found it could fit against the passenger side of the rack really nice. I welded up 4 tabs for it on the rack and drilled them out for flat head machine bolts so that the bold heads won't gouge the batteries.
Lookin' good.
Wednesday, August 13, 2008
Survey results - first pass
This morning I decided to see how the Conversion Kit survey was going.
I had 49 responses so far with the majority (45%) going with my components (156v, WarP 9, Zilla...) and 59% of those went with the Optima battery option. I'll take that as a vote of confidence - or maybe I was just lucky. This group was pretty split between the Basic kit at 38% and the Complete kit at 54%.
The runner up was pretty interesting... actually something I was considering for my next conversion...
39% of the votes went for an AC system from Selectria and the majority of the battery votes (47%) of this group went with Lithium. A good number (37%) went with Optimas.
Interesting...
There is still time to get your vote counted in the survey, and it only takes a few seconds (because there are only 3 questions). Just click here.
Monday, August 11, 2008
Iota is here

Got a big box today with a little 45 amp Iota in it. It's smaller than I thought, ought to be easy to find a spot under the hood for it. That's a dime on top of it so that you have an idea of the size.
By the way, I was going for their 30 amp model, but found a place that was selling the 45 amp model for about $135 - $15 more than the 30 amp model. This was about half what I thought I'd be paying, so why not go for the more powerful unit?
Saturday, August 9, 2008
Brackets on the motor rack


Got a chance to do some welding today and went after the brackets for the motor (cowl) rack. I decided to offset it to the passenger side so that it could be as close to the cowl as possible (making room for the brake booster). This also will give me a good location to mount the Zilla - just ahead of the booster. The front brackets weren't very tricky, but the rear ones had to be angled to align with some existing holes in the frame rail. The one on the passenger side had to sneak under 2 brake lines also, so it is angled and shaved on the top.
At any rate, the holes all line up and the welds look good. Next is to weld some tabs on the driver side to attach a bracket for the Zilla and on the passenger side to attach the Iota.
Oh, you might notice a little green box behind the rack. It is the Zilla's "hairball" (its wiring box). I screwed it to the firewall a week ago. After I get everything mounted I'll get started on the wiring.
Friday, August 8, 2008
Charger quandry
I was about to order the Manzanita Micro PFC-20 I planned to use when I found out some bad news. First, the price has gone up around $300, second, there is now an 8 week wait for delivery and lastly, it appears you can't get the battery regulators that are made to work with it.
The battery regulators are needed for the AGM batteries I'm using to keep them from being damaged from overcharging since they can't "off-gas" like old school flooded cells.
I spent some time researching the battery regulator options and found PowerCheq and BEQ1.
The PowerCheqs sight says they may not work with long battery strings. I contacted Ryan at EVSource who sells them to see if they would work with my 13 bat string. Ryan replied that he didn't recommend them, and haven't got a reply when I asked for the reasons why.
BEQ1s looked good and were designed to work with the Optima D34M batteries I'm using, plus they are $20 less than the PowerCheqs. I contacted the manufacturer of the BEQ1s to see if they would work with the PFC-20 and the answer was no - they only work with the Zivan NG3. I had looked at the Zivan, but they are not dual voltage like the PFC-20, so I would need two chargers - one for 220 at home and another for 110 opportunity charging while on the road.
The Zivan is smaller and cheaper than the PFC-20, so it's worth looking into, and maybe I can come up with a cheap way to handle 110 charging...
I checked around and found a step up transformer that says it can step up a 15 amp 110 circuit to 220, but doesn't give an amp rating for the 220, but it's less than $100. I sent the Zivan folks a message to see if they thought this idea would work. Their reply was to say the NG3 charger needed more amps than the charger would offer and that they would get back to me with a proposed solution.
Maybe I need to get a cheap Rusco for the 110 charging and mount the Zivan in the garage?
So, I guess I'll wait to find out what the folks at Zivan come up with...
Subscribe to:
Posts (Atom)

