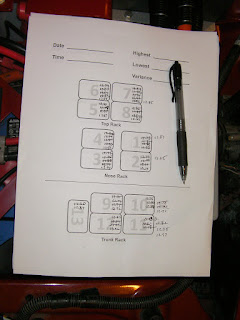
 Balancing the batteries has been a huge pain. I did get to learn a lot of things NOT to do.
- Don't expect that two batteries with similar idle voltage readings have the same state of charge. (I lost a good two weeks learning this one).
- Don't expect a standard battery charger to hold up to charging 13 batteries multiple times over 3 weeks.
- Don't expect your timer to not fail when you aren't watching
Wrong.
Some were always getting over charged while others got undercharged - the Equalizers would start blinking and batteries would begin to hiss.
The right way to do this is to bring them all up to 100% first. And measure the voltage THE NEXT DAY - not in an hour or even two hours after charging. I have a couple of batteries that will slowly drop over night back to where they started. Multiple long charges was the only way to get them up to capacity and stay there.
2. I have a good charger for my ICE car. It has a 6 amp and 2 amp setting with an ammeter on the front. After using it constantly, though, I noticed some batteries weren't charging. Comes out the crimp connection on the positive clamp had worked it's way loose. I would connect it up to the battery, read the voltage, plug in the charger and see the voltage rise, but when I returned the voltage was back where I started. At first I thought the battery was being difficult... Then I found the wiring problem.
3. My charger doesn't shut off by itself. To avoid overcharging, I used an appliance timer set to an hour and a half. This was working pretty well until I got too confident and didn't check on it. Naturally, by the time I did check on it, the timer was stuck (it's little motor was overheating) and my battery was overcharged and hissing. The lesson here is to use a timer, but always check - don't assume.
In the end, I got them all above 12.84 volts (100% SOC) and ran the Zivan for a half hour or so. The Zivan did it's pulse charging thing, and everybody appears to have survived.
While all this battery baby-sitting was going on, I did disassemble the instrument cluster to fix the lamp problem and some of the wiring. I was trying to pull 12v and GND from the back of the cluster for the temperature gauge, but it still doesn't work right. My new plan is to grab GND from the dash and 12v from the alternator light (the Zilla uses this as a contactor closed indication, so it's on when ever the car is operational). That should do it. I'll check the ammeter and tach after this.
 The hood ended up being trickier than I thought it would be. First, the box I put the high voltage components in was a little too tall. It fit under the hood with the top off, so I only needed to take less than a 1/4 inch off of it. I had plenty of room, so I went for 1/2 inch just to make sure there were nothing banging when I hit a bump.
I cut the top edge of the front down with my Dremel. The plastic cut easily, but was so hit it would melt back together after the blade passed by. I only broke three blades dealing with this. I decided to cut the sides at an angle so that the back side of the box was not cut - mainly this was to save me time, but it also looked better angled - it looks more like it was designed to go under the hood.
I hadn't thought about the hood prop rod. The stock mount was below the top of the high voltage box, and if I just bent the rod to go over the box, it would hit part of the headlight bracket and never reach the hood. I ended up mounting it to the back of the headlight bracket and after straightening it out, putting a bend in it to lie over the top of the high voltage box when down. Of course, this made the clip that the for end of the rod too low. I ended up using an unused wiring mount to mold down the end of the rod.
The hood went back in place pretty easily - it's aluminum, so you don't need to get a neighbor to help. The only thing that didn't align properly were the headlight covers. Comes out the back side of the covers doesn't have any support, so every time you lean on them, they drop a bit. I carefully finessed these back up into position and it looks like stock.
 Now the only way you know it's electric is from the lack of a exhaust pipe and the buzz it makes as it drives by...


No comments:
Post a Comment