About a year ago, I was driving my '92 Miata and I couldn't find reverse gear. I made a couple of simple fixes and, so far, I haven't had any trouble with reverse since.
Here's a tip or two if you find you can't get your Miata into reverse:
If you have trouble shifting into reverse with the clutch fully engaged, try giving the car a little throttle while you release the clutch AND pull the shifter into reverse. You may feel the gears start to grind a bit, but it will often slip into gear.
If that doesn't work, you can replace the reverse light switch and replace your transmission fluid with synthetic. I'm not sure which of these made the biggest impact since I did them the same day, but neither of them are expensive or hard to do.
- Replace the reverse light switch Reverse lights are often a trouble spot for NA Miata's. Either the switch fails or the connectors to the switch work their way loose. The reverse switch can also become stuck which may prevent you from shifting into reverse. This may have been the problem with my car, since the shaft was hard to depress and felt like it was worn into place. It's really not too difficult to replace the switch itself, though make sure you reinstall your old washer. Without it the switch will protrude into the transmission a little too far making matters worse!. Replacing the switch isn't hard, but connecting the switch it IS. The wiring is on top of the transmission (!) making it quite a chore to connect. Luckily, they aren't polarized, so either wire on the harness can go to either wire on the switch - but that's small consolation.
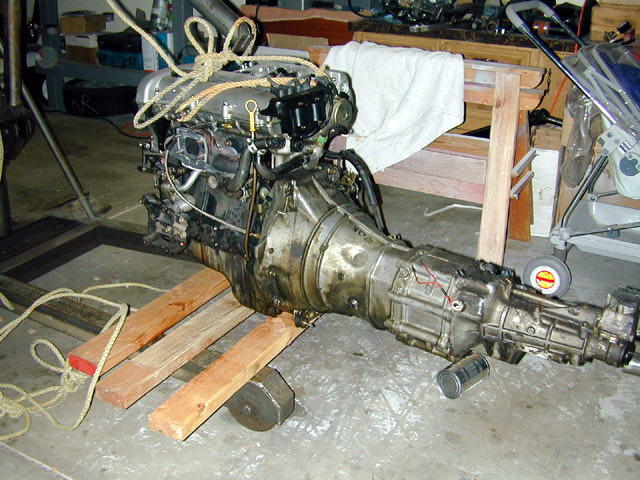
Check out the red wires on the left side of the transmission in this picture from Hakuna Miata. They head up and over the transmission to the right side where they are connected to the harness. Fun eh? As an added safety measure, I would recommend taping these connectors with some duct tape after they're connected. You don't want to do this again...
- Replace your transmission fluid with synthetic. Synthetic oil is much slipperier then the run of the mill stuff, which makes the transmission easier to shift and could improve your mileage as well. You'll want to refill the transmission with the car level so that you can get an accurate read on how much synthetic is in the gear box. Jack up both ends of your car and make sure you have enough room to work. You can get synthetic at most car parts stores for under $10, and while you are there you may need to pick up a couple of other things
- My filter plug used a square drive - which was not in my toolbox - so add that to your shopping list if you don't have one.
- Spray solvent. My filler plug would not come out for anything and the usual WD-40 did nothing. Comes out the last person to open it (or maybe it was the factory?) gooped it up with a lot of thread lock. A little spray solvent did the trick.
- A fluid pump. You'll need a pump to get the fluid in the transmission, since the filler is too close to the tunnel for the bottle to fit.
- The Synthetic transmission oil. The manual says 2.1 quarts are needed, but I used a little less than 2 and spilled a bit as well.
After I made these simple changes, shifting was noticeably improved. And in the past year, I never had a problem shifting into reverse again. Hope it works for you.