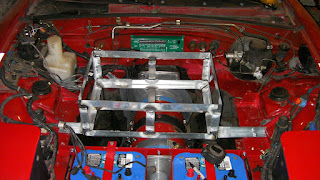

Got a chance to do some welding today and went after the brackets for the motor (cowl) rack. I decided to offset it to the passenger side so that it could be as close to the cowl as possible (making room for the brake booster). This also will give me a good location to mount the Zilla - just ahead of the booster. The front brackets weren't very tricky, but the rear ones had to be angled to align with some existing holes in the frame rail. The one on the passenger side had to sneak under 2 brake lines also, so it is angled and shaved on the top.
At any rate, the holes all line up and the welds look good. Next is to weld some tabs on the driver side to attach a bracket for the Zilla and on the passenger side to attach the Iota.
Oh, you might notice a little green box behind the rack. It is the Zilla's "hairball" (its wiring box). I screwed it to the firewall a week ago. After I get everything mounted I'll get started on the wiring.
I see you have the motor already installed. Can you provide pictures and a source for the miata transmission/motor mount setup please?
ReplyDeleteHi anonymous ;)
ReplyDeleteSorry for the late response - I was hoping that someone else monitoring the blog would jump in with an answer.
I bought the adapter from Electro Automotive: http://www.electroauto.com/catalog/adaptors.shtml
There are a couple of Blog posting on it. First is here: http://evmiata.blogspot.com/2007/09/ordered-adapter.html
The adapter plate itself looks pretty basic and maybe could a DIY project, but the component that connects the flywheel to the motor shaft looks to be tricky. I think it's wise to spend the bucks on something like this and cut corners elsewhere.